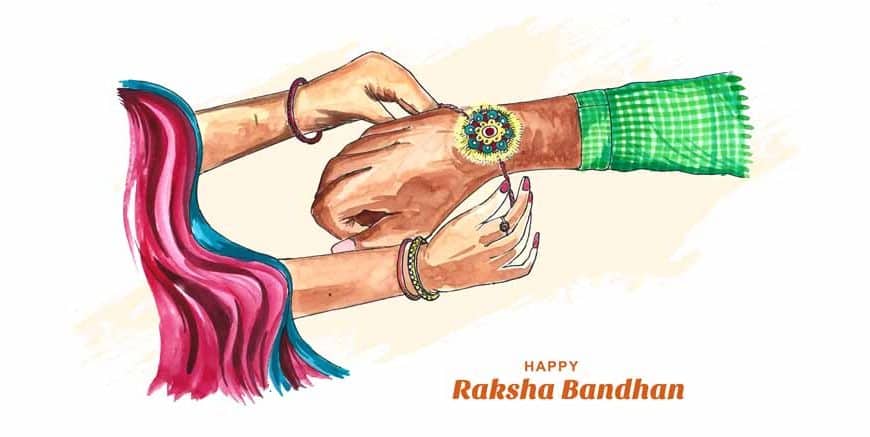
Remember when your little sister proudly gave you a homemade Rakhi, replete with glitter and questionable glue artistry? That is the magic of Raksha Bandhan! Let’s encourage our children to make their own distinctive rakhis this year. The satisfaction of creating something new, the delight of crafting, and the deepened sibling bond are more important than the finished result. We have many simple and enjoyable ideas to make this Raksha Bandhan really special, ranging from craft rakhi designs to elaborate beaded masterpieces.
Sample Project: Colourful Button Rakhi
Before we get into different rakhi craft ideas, let us start with an easy yet creative rakhi craft activity example – the Colourful Button Rakhi. Looking for a rakhi craft for preschoolers? This project works well with kindergarteners or older kids too!
Materials Needed:
Colourful buttons
Ribbon or thread
Glue
Scissors
Instructions:
Choose Buttons: Let your child pick out their favourite colourful buttons.
Prepare The Ribbon: Cut a piece of ribbon or thread to the desired length for making the rakhi.
Stick Buttons On Ribbon: Glue down the buttons on the ribbon in a pattern or randomly as per your child’s wish.
Let it Dry: Allow the glue to dry completely before tying it around someone’s wrist as a rakhi.
This simple activity not only allows children to use their hands skillfully but also lets them experiment with colours and patterns which ultimately makes each rakhi unique!
Paper Rakhi Craft
Here is another fun rakhi craft activity. Paper rakhi craft is perfect for young children because it involves materials that are easy to handle and steps that are simple to follow. Here’s how you can create beautiful paper rakhis in a few easy steps –
Materials Needed:
Colourful paper sheets
Scissors
Glue
Glitter
Ribbon or thread
Decorative stickers or sequins (optional)
Instructions:
Cut Paper Shapes: Cut various shapes out of different coloured papers. Circles, flowers and stars are some good options.
Layer And Glue: Layer the paper shapes on top of each other and stick them together with glue to form a rakhi base.
Decorate: Let kids sprinkle glitter, stick stickers or glue sequins on the rakhi for decoration.
Attach Ribbon: Stick a piece of ribbon or thread at the back side of the paper base to complete the rakhi.
This craft is simple yet very open-ended in terms of creativity – kids can make any shape, colour combination or design that they want using this method!
Beaded Rakhi Craft
If you want to add some elegance to your rakhis, beaded ones would be perfect. This project can be modified according to age groups so it suits both preschoolers as well as older children.
Materials Needed:
Colourful beads
Elastic thread
Scissors
Small charms (optional)
Instructions:
Cut The Thread: Cut an elastic thread long enough to comfortably go around someone’s wrist.
String Beads On Thread: Let kids string beads onto elastic thread experimenting with different colours and patterns.
Add Charms: You may also include small charms in between if desired.
Tie The Ends: Once done, securely tie both ends of elastic threads together after measuring desired length for rakhi making sure that it’s not too tight or loose either!
Felt Rakhi Craft
This craft not only looks great but also helps develop fine motor skills among young children which makes threading activity fun! Moreover, these rakhis are stylish and unique when finished by little hands..
What you need:
Various colours of felt sheets
Scissors
Glue
Needle and thread (optional)
Ribbon or thread
Decorative elements (buttons, sequins, etc.)
Instructions:
Cut Felt Shapes: Cut out shapes from the felt sheets. Hearts, flowers, and animals are great options.
Layer and Glue: Layer the felt shapes on top of each other and use glue to stick them together. You can also sew the layers together with a needle and thread for extra strength.
Decorate: Decorate the felt shapes with buttons, sequins or any other decorative elements you like.
Attach Ribbon: Glue or sew a piece of ribbon or thread to the back of the felt base to complete the rakhi.
Felt rakhis are sturdy yet soft to touch so they are comfortable to wear. Working with different coloured felts gives children a good tactile experience while allowing them to create their own designs freely.
Recycled Material Rakhi Craft
Recycling materials for rakhi making is not only fun but also educational. It brings about awareness in children regarding sustainability while creating something unique at the same time.
What you need:
Bottle caps
Old fabric scraps
Buttons
Ribbon or thread
Glue
Scissors
Instructions:
Prepare the Base: Use bottle caps as a base for your rakhi.
Decorate the Cap: Cover up this cap using old fabric scraps then glue it down securely with some adhesive substance such as glue stick or craft bond adhesive/glue gun etcetera.
Add Decorations: Next stick various button-like objects which are typically made from plastic material onto these fabric-covered surfaces around their edges where needed most according to desired design pattern requirements.
Attach Ribbon: Finally, attach a length of ribbon or thread at the backside/top side part of this cap by either stitching (using needle and thread) it into place or using a strong adhesive like a hot melt glue gun.
This particular type of craft is an excellent example where children can be taught about recycling/reusing waste materials thus teaching them how best they can make use of what would otherwise have been thrown away as rubbish thereby helping save the environment from unnecessary pollution.
Flower Rakhi Craft
What you need:
Artificial flowers
Ribbon or thread
Glue
Scissors
Instructions:
Select Flowers: Choose artificial flowers that your child likes the most or simply wants to work with at any given moment during this activity session.
Prepare the Ribbon: Cut a piece of ribbon or thread according to desired length required for making a flower rakhi.
Attach Flowers: Use a suitable glue/adhesive substance e.g., craft bond adhesive/glue stick/hot melt gun etcetera in order to fix those selected artificial flowers onto one end part of prepared ribbons threads then arrange them nicely together along their entire length until satisfied with final outcome achieved after which let everything dry well before proceeding next step which involves tying up completed rakhi around somebody’s wrist during festival celebration period like Raksha Bandhan etcetera.
Let it Dry: Allow enough time for all glued parts/joints between different materials used here such as ribbons threads and flowers themselves etcetera to dry completely before moving on towards next stage involving knotting finished rakhi around one’s wrist during festivities like Raksha Bandhan etcetera.
Flower rakhis are easy to make yet look very elegant when finished so children will have fun creating them using bright colourful artificial flowers.
Also Read – Rakhi Poems in English
Conclusion
Raksha Bandhan is a great occasion to celebrate with kids by making rakhis. In addition to being enjoyable, these activities improve fine motor skills, creativity, and a sense of success. The time you spend creating it together will be treasured, regardless of whether you go with a paper rakhi, beaded patterns, or recycled materials.
Enrolling your child in EuroKids offers more interesting and educational activities. EuroKids is the ideal environment for your child’s growth and learning, with a focus on holistic development and a diverse choice of creative programming. For additional information, please visit the nearest EuroKids centre today!
Sources:
Pinterest – India
Rakshabandhan 2023: DIY Rakhi Craft Activities for School Students (jagranjosh.com)